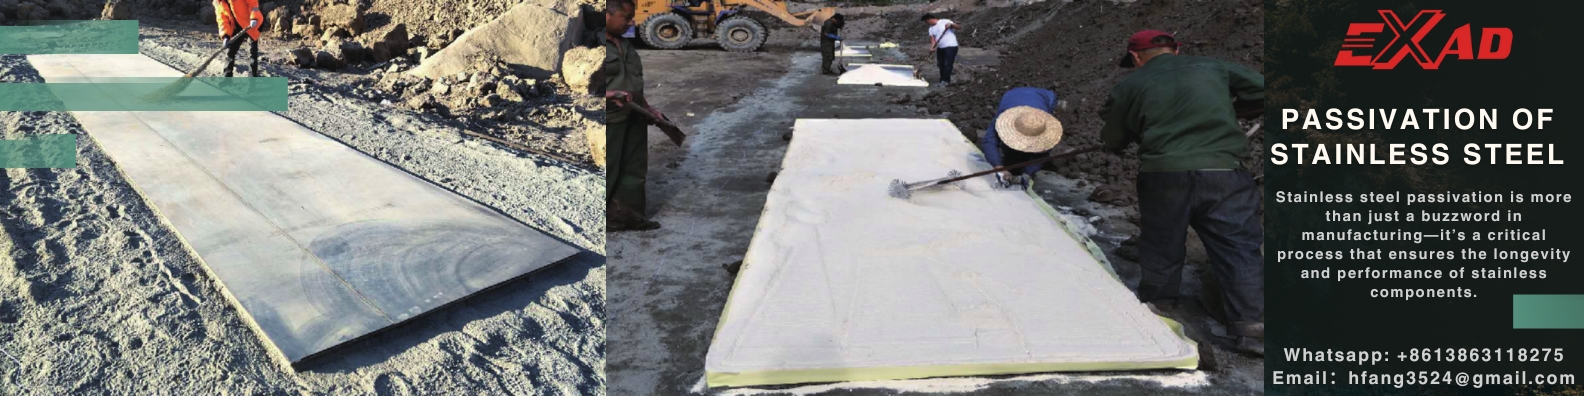
Stainless steel passivation is more than just a buzzword in manufacturing—it’s a critical process that ensures the longevity and performance of stainless components. From aerospace parts to medical devices, stainless steel often operates in environments where corrosion resistance is non-negotiable. In this comprehensive guide, we’ll walk you through the essentials of stainless steel passivation, including what it is, why it matters, how it works, and the dos and don’ts to help you get the best results.
What Is Passivation Of Stainless Steel
In machining and many areas of manufacturing, such as medical equipment and aerospace manufacturing, the treatment of stainless steel parts is often involved, and the word “passivation” is frequently mentioned. So what exactly is passivation? It is actually a widely used metal surface treatment process, the role is to prevent corrosion.
Surface passivation is particularly effective in cases where you want to extend the service life of stainless steel parts. In the process, the surface of the parts will often remain some iron particles, if not dealt with, these iron particles will accelerate corrosion. Passivation removes them, and whether it’s a 300 series stainless steel or a specialty alloy, passivation provides a clean, stable surface for demanding applications.
Passivation not only enhances the corrosion resistance of stainless steel, it also contributes to product reliability. For components that are exposed to harsh environments or have high corrosion resistance requirements, stainless steel passivation is the key to long term durability and consistent performance, and by removing surface contaminants and reinforcing the chromium oxide layer, it plays an important role in post-processing of medical, aerospace and semiconductor components, among others.
Why Passivated Stainless Steel Is Needed
Stainless steel itself relies on the thin layer of chromium (and nickel) oxide on its surface to provide a certain degree of corrosion resistance. However, sometimes this layer of protective film may not be able to form their own well, or in the process of use was damaged, so that the stainless steel becomes susceptible to corrosion.
This is where the passivation process comes in, and its main task is to re-form the protective layer, or to repair the damaged layer to its ideal state. Passivation of stainless steel parts has many benefits, the first of which is that it prevents the parts from rusting and corroding. In addition to this, there are other benefits as well.
Corrosion Resistance
Although stainless steel itself has a number of excellent properties, improving its corrosion and rust resistance is significant for many industries. After forming a protective oxide layer through passivation, the durability and service life of stainless steel products can be enhanced. For companies that use stainless steel in harsh environments, this passivation process can be so important.
Aesthetics
The passivation process also adds to the appearance of stainless steel by cleaning away any surface impurities, discoloration, or stains, giving stainless steel a more pleasing look. Of course, not all industries are particularly concerned about appearance, but in areas like medical equipment and food processing, it’s still pretty critical that the steel looks good.
Compliance
Manufacturers have to adhere to strict industry standards when producing components in order to do so. Common standards for stainless steel passivation include ASTM A967 and AMS 2700. In addition, agencies such as the U.S. Food and Drug Administration (FDA) and the U.S. Environmental Protection Agency (EPA) have established regulatory requirements to ensure that medical devices, food, and pharmaceutical processing equipment meet specific standards for cleanliness and safety.
Passivation Types
Primary passivation method – nitric acid
The most common chemical method for passivating stainless steel surfaces is to apply nitric acid. Nitric acid is a strong inorganic acid, and it is very powerful, quickly dissolving all iron compounds and other trace metals on the surface.
At the same time, it is also a strong oxidizing agent, and in the process of dissolving metals, it can also activate the chromium oxide layer. However, for such a powerful chemical as nitric acid to react effectively and thoroughly, a high temperature environment must be used, and the reaction time must be extended. Generally, 3-4 hours, the temperature must reach 80°C/175°F, and the concentration of nitric acid must be in the range of 20%-50% by volume.
It should be noted here that nitric acid is very corrosive to gaskets under these conditions, so it is likely that the gaskets will have to be replaced after the passivation procedure is completed. In addition, if the stainless steel surface already shows signs of corrosion, such as contact with seawater, it may be necessary to use a stronger passivation agent based on hydrofluoric acid.
Alternative passivation methods – citric acid
Citric acid is sometimes used to passivate stainless steel. In addition to being an effective surface remover of iron and its compounds, it is safer to use than nitric acid, is biodegradable, produces fewer wastewater problems, and can even be used as a food ingredient.
But it has a characteristic, it is not an oxidant, and cannot achieve the second step of the classic passivation, and must rely on natural air oxidation to complete the subsequent process. When citric acid passivation, the time is generally 5 hours, the temperature is ambient temperature to moderate heating, and the concentration is 12% by weight.
It should also be noted that dichromate is a strong oxidant, sometimes added to enhance the oxidation of chromium, but it is toxic and is not allowed to be discharged into industrial wastewater, so most companies will not use it.
When To Passivate
There is no single rule for when to passivate equipment. Generally, equipment surfaces should be passivated before first use and after any modifications or repairs. Whether or not to continue passivating depends on how the equipment is used and whether the surface has been damaged.
Some companies passivate their processing equipment once a year as a routine maintenance operation. However, some companies need to passivate more frequently because they process acidic foods with high chloride content (such as salsa, tomato sauce, etc.) that are very corrosive to 304 stainless steel composite plates. Processors that use water with naturally high chloride content also need to passivate more frequently because chlorides can destroy the protective layer on the surface of 316 stainless steel composite plates.
In addition, if you find iron deposits forming on the stainless steel and the source of the iron is not water, it usually means that it is time to passivate. Chemical supply companies now have test kits that can detect free surface iron. If the test results are high, it is time to schedule passivation.
3 Steps For Stainless Steel Passivation Process
Step 1: Cleaning
Cleaning the surface of stainless steel sheet is a key step in the success of passivation. If there are accumulated impurities on the surface, they will block the passivation acid from reaching the stainless steel surface, and all the preparation work done before will be in vain. Common surface impurities include dirt, grease, mineral and synthetic oils, hydrocarbons, and other substances left over from the industrial environment.
There are many ways to degrease the surface of stainless steel, such as using alkaline detergents or high-temperature baths (up to 65°C), which are very effective in removing impurities. In addition, engineers often use techniques such as camphor testing to check whether the surface quality after cleaning is up to standard.
Step 2: Acid Bath
The second step in the passivation of stainless steel clad plates is the acid bath. The cleaned stainless steel surface is immersed in a bath containing an acid solution and some additives such as accelerators and inhibitors. In this process, a chemical reaction occurs to remove free iron from the metal surface. The main purpose is to increase the ratio of chromium to iron, so that there is more chromium available for oxidation instead of iron.
In the acid bath step, there are three key parameters that affect the final effect, namely the concentration, temperature and duration of the acid bath. Different combinations of these parameters will produce different results, so the experience and professional skills of engineers are particularly important when setting these parameters. Only when they are set reasonably can the best passivation effect be achieved.
Step 3: Quality Testing
The last step of stainless steel metal sheet passivation is quality testing. The passivated metal must pass a series of inspections. Engineers will use several testing methods at this stage. For example, creating an environment that is prone to rust, that is, immersion testing, allows stainless steel to be “tested” in a continuous cycle of wet and dry environments, while constantly observing for signs of corrosion. If the passivation is not done well, obvious rust will usually appear on the surface.
There are also chemical tests such as ferrous-based tests that are also very useful. It can detect the condition of iron by reacting with iron and changing the appearance of iron. In addition, equipment such as passivation instruments are also very popular, which can be used to check the reactivity of stainless steel. Moreover, it is also common to conduct quality checks during the acid bath process. By monitoring the iron concentration and acidity in the circulating acid bath, it is possible to determine how the passivation process is progressing and whether the effect is good.
Stainless Steel Passivation Precautions-Do’s And Don’ts
Do’s
- Always clean and remove any oxide or heat staining particles before passivating.
- Avoid using excessive amounts of chloride, which can cause harmful flashing. Use good quality water with a chloride content of less than 50 parts per million (ppm) if possible, but tap water is usually adequate and can tolerate chloride levels of several hundred ppm in some cases.
- Change the bath on a regular basis to prevent the passivation potential from dropping, which can cause flashing and damage to parts. Keep the bath temperature well controlled as it can cause localized corrosion if it gets out of control.
- During high-volume operations, change the solution on a strict schedule to minimize the possibility of contamination. Use control samples to test the effectiveness of the bath; if the sample corrodes, the bath should be changed immediately.
- Specify machines specifically for stainless steel, always use the same preferred coolant when cutting stainless steel, and do not use these machines for other metals.
- Rack parts for processing individually to avoid metal-to-metal contact. This is especially important for free-machining stainless steels, where the passivation and rinse solutions need to flow freely to diffuse corrosion products from sulfides and prevent acid pockets from forming.
Don’ts
- Do not passivate stainless steel parts that have been carburized or nitrided. After such treatment, the corrosion resistance of parts may be reduced and they will be easily corroded in the passivation tank.
- Do not use ferrous tools in a dirty shop environment (such as floors, equipment, coolants, etc.). Choose carbide or ceramic tools to avoid the presence of steel grit.
- Don’t forget that parts may also corrode in the passivation tank if they are not heat treated properly. Parts such as high-carbon, high-chromium martensitic grades must be hardened first to resist corrosion, and passivation is usually performed after tempering at a temperature that maintains corrosion resistance.
- Do not ignore the concentration of nitric acid in the passivation tank. Check its concentration regularly using a simple titration procedure.
- Do not passivate more than one stainless steel at a time. This will avoid confusion and prevent galvanic reactions and unnecessary losses.
Conclusion
Passivation is a fundamental finishing step that adds real value to stainless steel components—enhancing corrosion resistance, aesthetics, and regulatory compliance. Whether you’re working in food processing, aerospace, or semiconductor manufacturing, knowing when and how to passivate can extend the service life of your equipment and ensure consistent, safe performance. By following proper passivation protocols and staying aware of best practices, your stainless steel products can truly shine—inside and out.